

This post is on how to do a full Backup and Restore of your Windows 10/11 PC, using a backup system image you created, and then restore that backup image to a new drive – maybe your PC’s drive crashed or you moved to a bigger drive.
Am planning two more similar posts – 1) Configuring System Restore ‘n then creating restore points which can be used later, if something you added or an update went wrong, to restore your PC back to a point before something went wrong. 2) Reset PC ‘lets you perform a clean reinstallation and update of Windows while keeping your personal data and most Windows settings intact. In some cases, a clean installation may improve your device’s performance, security, browsing experience, and battery life‘. ‘Sorta‘ a series…so to speak. 🙂
Create a backup System Image
Windows 10/11 uses the Backup and Restore (Windows 7) utility, which is found at Control Panel >> Backup and Restore (Windows 7), to create a system image that can be used later to restore your PC. Easy to use ‘n I’ve had great success wid it thru Win7 Home Premium, Win10 Pro, and Win11 Pro. Before that I had Vista Ultimate, which came wid a similar Backup and Restore utility, and my backup image was saved to CDs ‘n maybe later to DVDs (??😳 I forget?!) – again, great success wid it.
Only issue I’ve ever had was trying to restore SSD images to an M.2 PCIE NVMe drive, i.e., Backup and Restore (Windows 7) couldn’t do it. M.2 PCIE NVMe images to M.2 PCIE NVMe drives worked fine—ended up doing a clean install, which worked great. Haven’t tried doing an M.2 PCIE NVMe image to SSD, but may soon when I build a new computer ‘n move ‘Guts‘ of this one (‘Apevia‘) to main test computer ‘Rose‘.
Lots of pics so lets get started! 😊
I use a Kingwin KF-251-BK ‘Dual-Bay Internal Tray-less Rack for 2.5” SATA HDD or SSD‘ or similar tray-less racks or USB Hot Swap SATA Bay docks because I don’t like keeping backup images on the PC. SATA to USB Cable has also worked great for me, but those don’t work wid the big old ‘clunker’ HDDs.
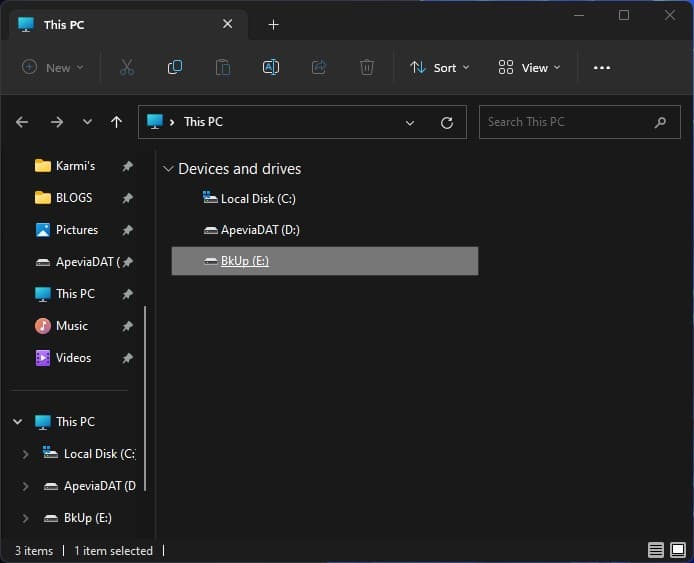
Make sure you know where you backup drive for the System Image is located – mine is BkUp on (E).
Open the Control Panel:

Click on Backup and Restore (Windows 7):
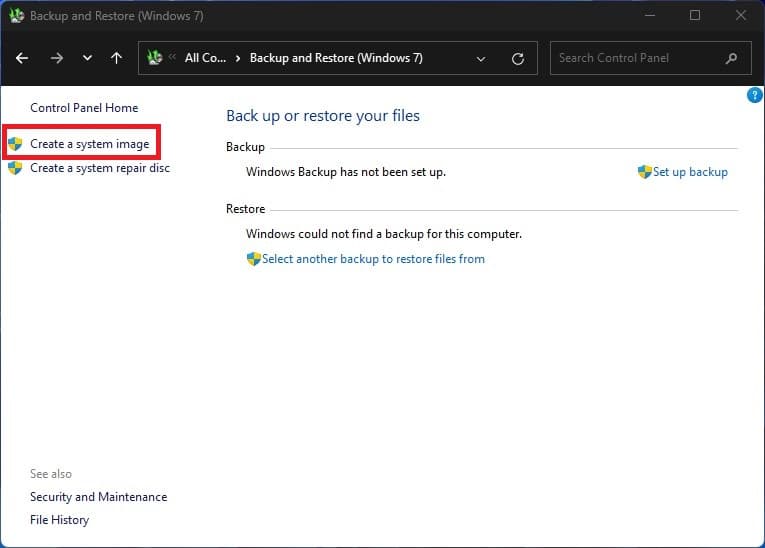
Click on Create a system image:
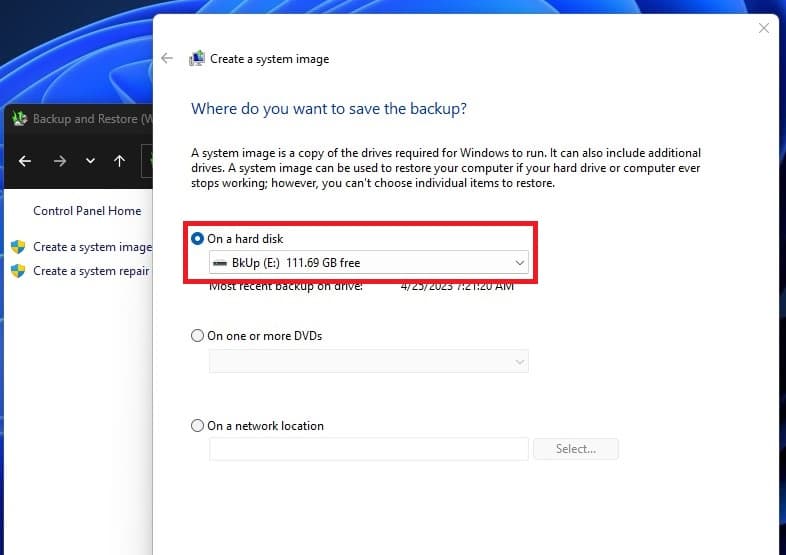
Select the target drive for image – mine is BkUp on (E):
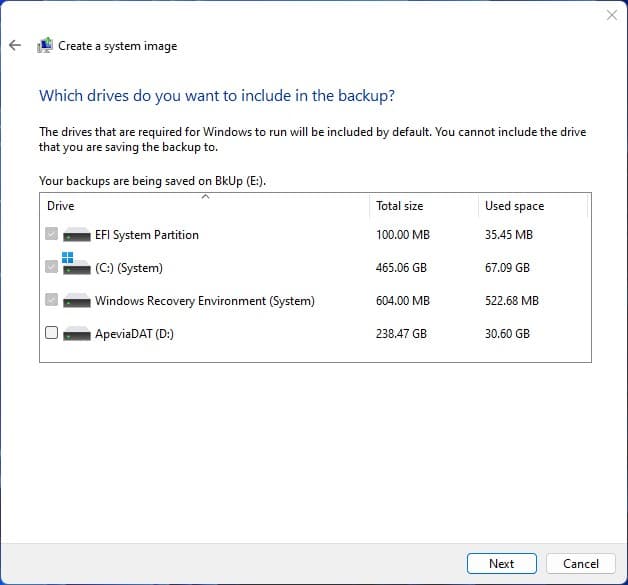
I go wid the default EFI System Partition, (C:) (System), and Windows Recovery Environment (System) options since I back up my main DATA drives differently – click Next:
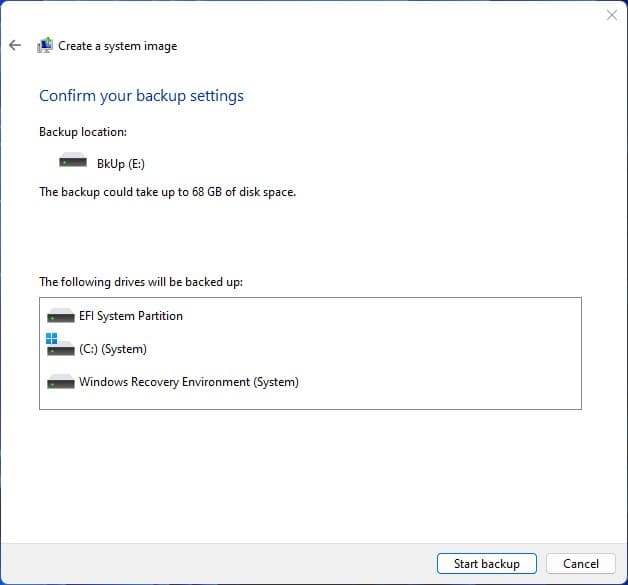
Confirm the backup settings – click Start backup:

Windows is saving the backup:

Backup completed successfully – a popup opens ‘n asks if you want to create a system repair disc, which I don’t since I keep a full Win11 Pro installer on a USB – click Yes if you don’t have the Windows installer or a Windows system repair disc.
That does it, you now have a backup System Image to restore the PC as is—in case you need to.
System Recovery using a backup System Image
A few months later, someone gives you a new faster ‘n BIGGER drive, and you want to see if that image will work; however, that’s an old image now since you failed to make a newer one every 4-5 days (Shame Shame Shame!!!), so you need to create a new System Image for this new drive.
- Note: I use two SSDs to keep fresh System Images on, and in case one stops working. Also, a backup system image can be restored to the exact same size or bigger drive, but not to a smaller drive.
OK – open Settings > System > Recovery:
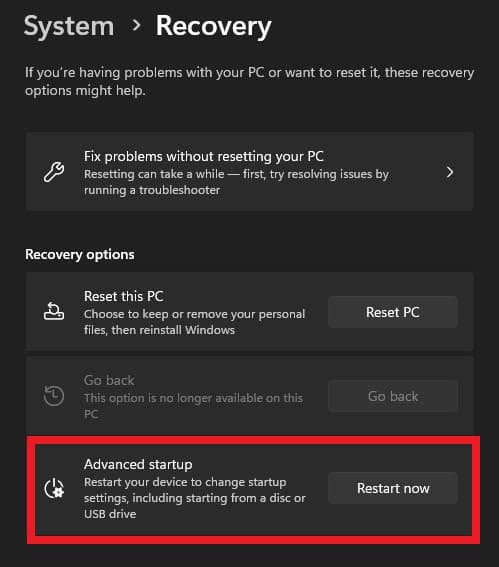
Look for “Advanced startup” – click Restart now, and system will reboot:

The pics may not always look the same, but you’re looking for certain options that will be there – in this case, we’re looking for the Troubleshoot option ‘n click it:

Select Advanced options:

Click See more recovery options (red highlight at bottom):

Click System Image Recovery:
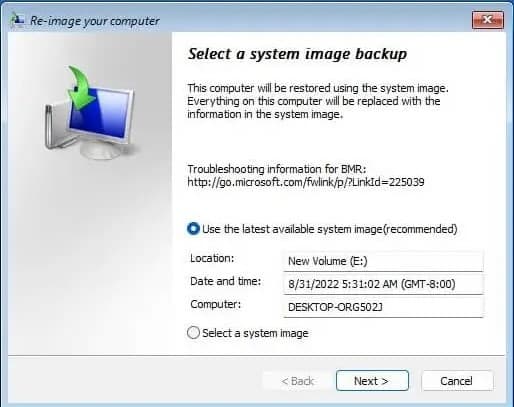
It usually shows the “latest available” backup system image, but you can also pick another image by selecting “Select a system image” at bottom – click Next:
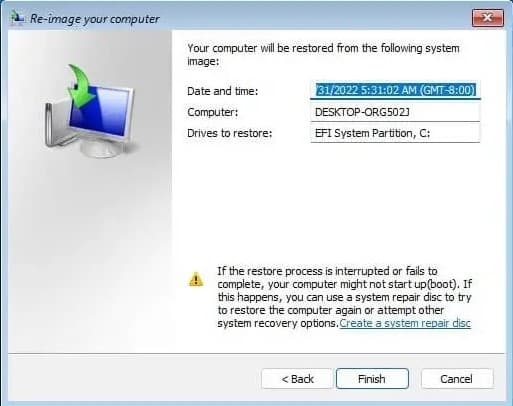
If all looks OK at this point – click Finish.
It finishes restoring the image to that new drive you got, fairly quickly, and then reboots into the restored desktop as it was when that image was made.
Conclusion
I rotate two SSDs every 4-5 days, creating a new System Image on one, and keeping the older one in case something goes wrong – which for me has never happened. 🙂🤞Most modern Windows OS licenses are tied to the motherboard, so as long as the motherboard is OK you can restore System Images to a drive connected to it.
I mentioned at the beginning that two more similar posts are in the works – 1) Configuring System Restore & 2) Reset PC – and I will link to them here as those posts are finished ‘n posted.
5/7/2023 UPDATE: #2 — System Restore, creating Restore Points, and restoring your Windows PC