
FlashBoot is still quite new to me — 3-4 days of testing ‘n using it have shown me how much I DON’T know about it, but at the same time it has continued to work amazingly well for a new user like me. 😊 Have tried different ways of installing it to a USB, and plan to even try installing it to an SSD at some point later. However, for this FlashBoot 3-part series, FlashBoot 3.3n Pro is going to be the final part. See Part 1 & Part 2 for more info.
Installation
FlashBoot 3.3n Free was so easy to use ‘n work wid that I decided to go ahead ‘n purchase the $29.95 FlashBoot 3.3n Pro. Had found a 25% off coupon, which knocked $7.49 off the price, and I ended up paying just $22.46 for a product that can be renewed for free as updates come in — WOW!
Downloaded the 67.9 MB flashboot-3.3n-pro zip file, then open it ‘n found the steps very similar to the Free flashboot-3.3n-setup application, except that the Pro features worked.
Used a 128 GB Samsung FIT Plus USB 3.1 Flash Drive as the ‘Target‘ device for the cloned installation. Mainly keep just the Win11 Pro OS on the ‘Source‘ device ‘n it only uses 88.3 GBs, and the cloning reduced that size down to 55 GBs, so the 128 GBs USB worked fine.
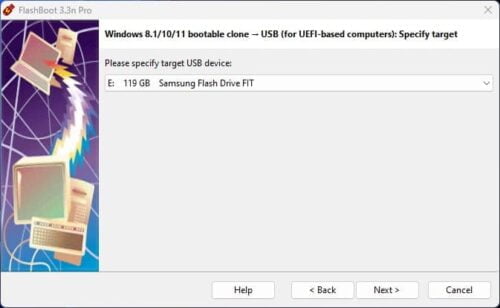
- That pic is out of the steps order, but inserted after just mentioning the ‘Target‘ device. Make sure you select the correct device.
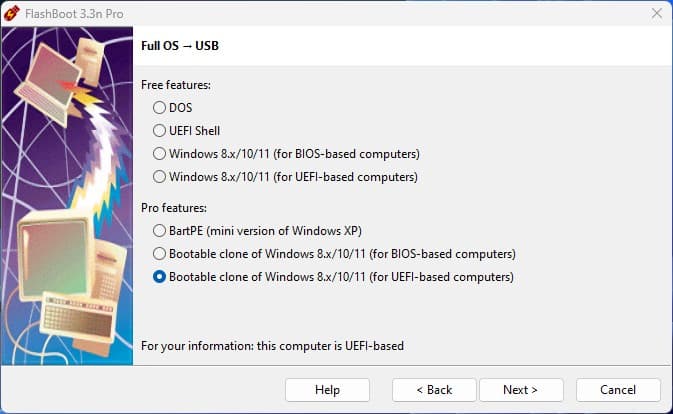
Selected the “Bootable clone of Windows 8.x/10/11 (for UEFI-based computers)” option (see TOP above pic) and away the FlashBoot Wizard went. 👍👌
Next you get the “Files & Folders” option:

I went wid their default option, and that has worked out fine — all the applications like LibreOffice, GIMP, Telegraph, IrfanView, BeeBEEP, bunch of utilities, USB creators, browsers, etc. were apparently included in the cloning. MS Office Home and Student 2016 wanted to be activated, but I have skipped that step for now. Some of the Windows apps like the Snipping Tool & Xbox Game Bar had to be ‘Repaired‘ in System Settings after the cloning, but all that ‘Stuff‘ was included in the default option.
Compression option of the bootable clone was next:

I went wid the default — “Clone without compression (default)”.
Access to fixed disks options were next:

I selected “Yes, allow access”.
“Formatting options” was next:
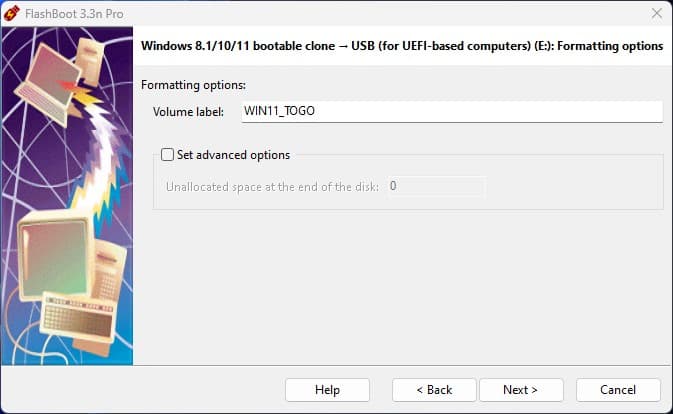
I went wid their default.
Then you get the standard ‘double-check‘ “Summary” window view — looked good ‘n I clicked the “Format Now” box.
Two install tests — one was 65-minutes ‘n the other 1-hour ‘n 40-minutes. A lot slower than the FlashBoot Free, but I have my main computer ‘Apevia‘ on a tiny 128 GB USB now — all settings & apps.
Post Installation
FlashBoot 3.3n Pro installation had one problem — I couldn’t get it to boot-up on the ‘Apevia‘ computer that created the FlashBoot Pro USB!? I have a 970 EVO Plus NVMe® M.2 SSD 500GB drive in it ‘n don’t want to remove it just for a test, but maybe since the USB is a clone of the NVMe M.2 — that Win11 Pro ain’t gonna let its clone boot-up on the machine, but I dunno…
However, FlashBoot 3.3n Free version boots up on ‘Apevia‘!? As mentioned earlier, have only been 3-4 days using FlashBoot, so am not close to knowing or understanding all its ‘Workings‘ yet. It’s working fine on the ‘Rose‘, ‘Frank‘, and ‘DIYPC‘ (back in the shed!) computers.
Here are those three’s “About” pics:
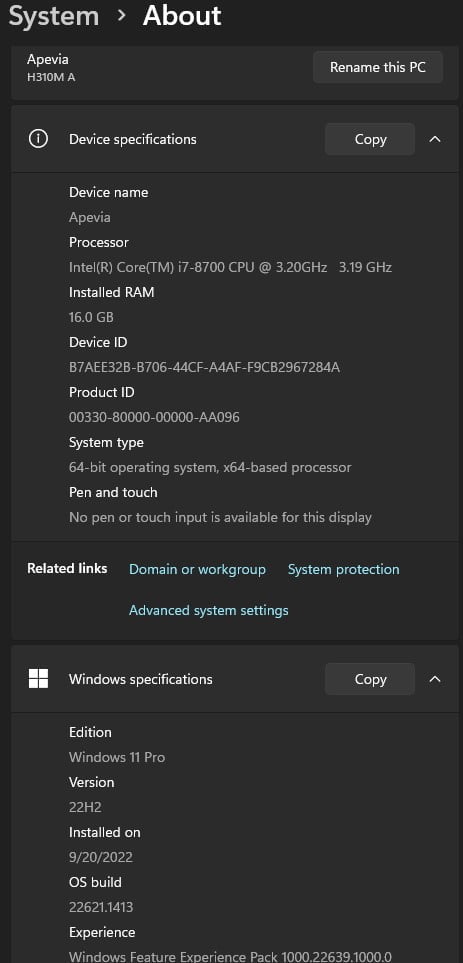
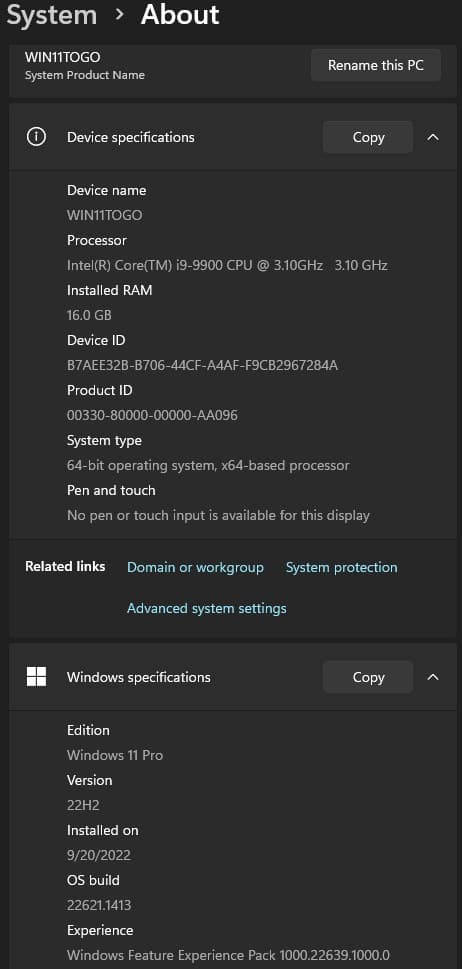
‘Rose‘ & ‘Frank‘ — Activated ‘n both are Intel machines:

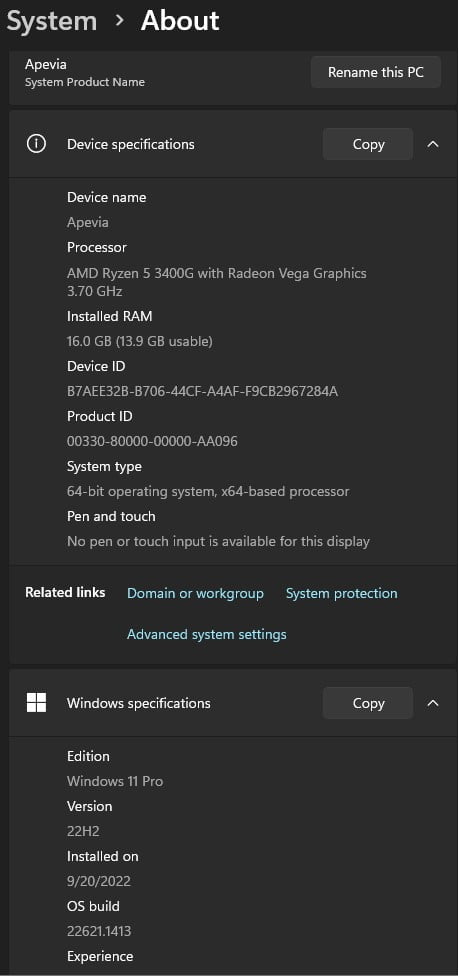
‘DIYPC‘ the AMD machine didn’t activate, but all else worked well on it.
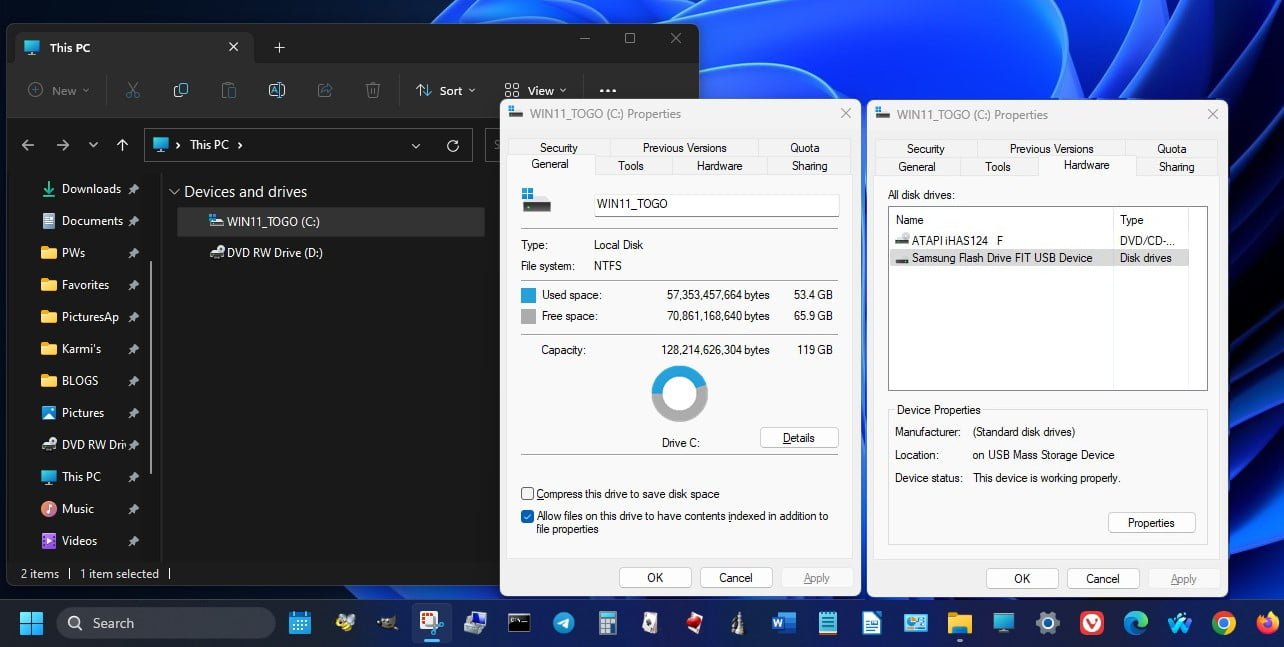
This next pic shows brief of what the FlashBoot 3.3n Pro installation’s Taskbar ‘n This PC ‘n Samsung 128 GB USB looked like:
‘Final‘ Conclusion
That last pic showing the Taskbar was basically why I purchased the FlashBoot 3.3n Pro, and it was well worth the $22.46 I spent for it. FlashBoot 3.3n Free is a *GREAT* bargain, but it would’ve needed a lot of customizing before it felt right for me, and I can always create a fully customized one later — IF I decide that I want or need a FlashBoot USB to boot into ‘Apevia‘ wid. ‘Apevia‘ is my main working computer so I don’t mess wid it much on tests ‘n such — I keep new backup images of it, so don’t really need to boot a USB of the same OS on this computer.
I’ll probably work on some more tests of FlashBoot, e.g., installing it on a SSD ‘n other devices — definitely plan on testing if I can get it on the converted Chromebook that is now a Fedora Linux Laptop/Tablet/Sketchbook.
As far as FlashBoot 3.3n Free & Pro being automatically Activated on the Intel computers, I’m starting to think that Activation isn’t required in this FlashBoot Windows To Go type of setup (???). I never entered a License Key code, and the USB was going between 3-4 computers wid three showing they were Activated — ‘sOmEhOw‘!?! Not like a normal Windows installation, even on the AMD computer that never Activated, where it would normally be reminding you that you have so ‘n so days to Activate it.
Excellent product/s by PrimeExpert Software!