
Fedora Linux 38 is out ‘n I’ll be doing a two part series on Fedora Linux 38 Cinnamon SPIN. This post is Part 1 ‘n will be on the System Upgrades I have just done — two upgrades from Fedora 37 ‘n one upgrade from Fedora 36. Part 2 will be doing a clean installation using the Anaconda installer.
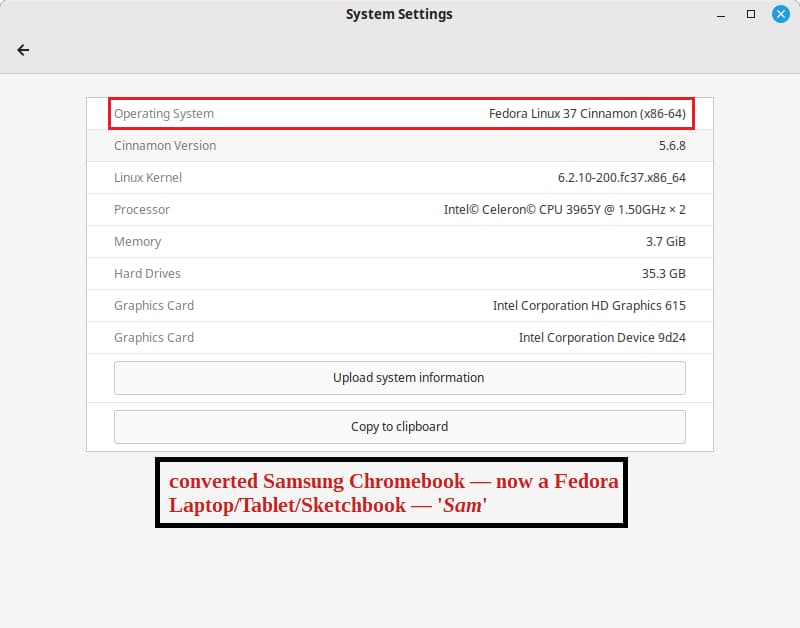
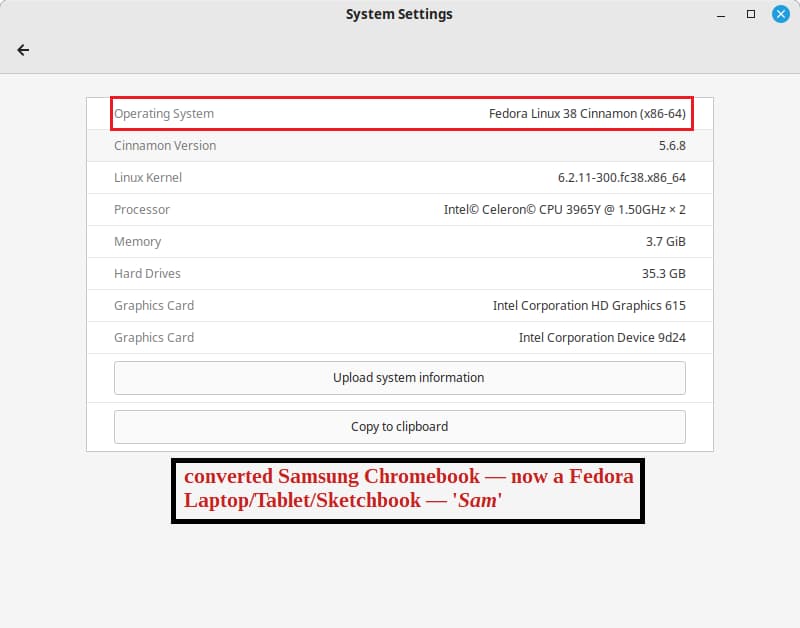
Fedora Linux makes a great portable OS ‘n I have it install on two USBs — a 64 GB SanDisk Ultra for its portability & a 64 GB SanDisk Ultra Fit that stays plugged into a switched SABRENT 7 Port USB 3.0 Hub. The 7 port hub holds two other Linux Distros that I use ‘n test at various times on my ‘Rose‘ main Test Machine. Both of those are now upgraded to Fedora 38. The other upgrade of Fedora Linux was done on a converted Samsung Chromebook, i.e., now a Fedora Linux 38 Laptop/Tablet/Sketchbook — ‘Sam‘.
System Upgrade to Fedora 38
A System Upgrade is only officially tested over the 2 previous releases, e.g., I will be upgrading to Fedora 38 from 36 & 37. I believe for older versions it involves more steps, e.g., if I had Fedora 35 then I should upgrade to either 36 or 37 before upgrading to 38. One test yesterday wid a Fedora 36 upgrade to 38 caused issues wid the Nvidia driver, so from now on I will upgrade to newer releases from just 1 previous release if I have a Nvidia driver involved, and maybe using the 1 previous release method to upgrade is the wiser option. 🤞🤔👍🙂
If you are upgrading a Fedora Workstation (GNOME) or from Silverblue then read this first: Upgrading to a new release of Fedora. The method I’m using is for the Fedora SPINS — it requires using the terminal ‘n the command-line.
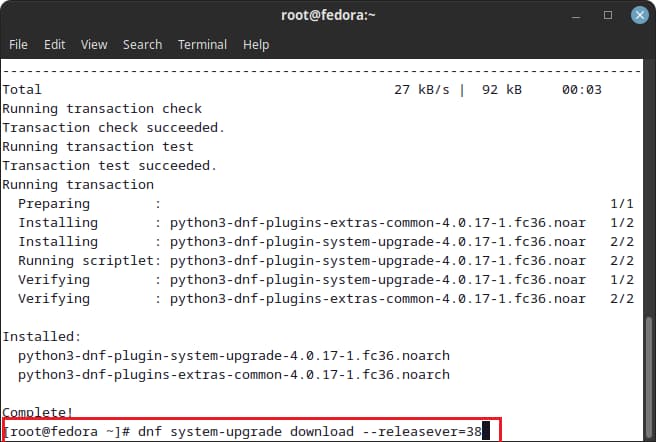
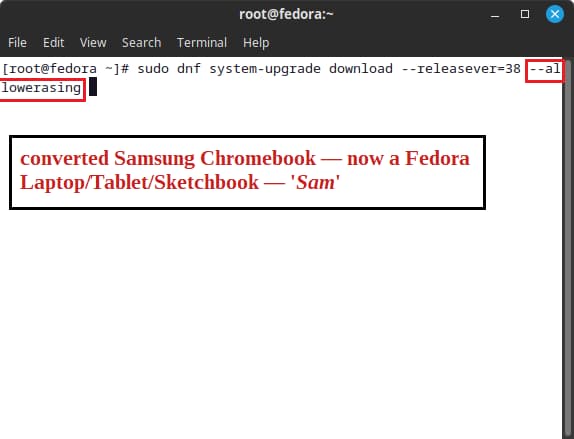
The pics I will be using mainly follow the DNF System Upgrade command-line’s that are listed; however, I run the upgrades as a Root User so I don’t use “sudo” in my command-lines, but you can if you are not root. They can vary a tad, so I may show two options that were used between the 64 GB SanDisk Ultra USB & the Laptop/Tablet/Sketchbook — ‘Sam‘ system upgrades. Here is the list I used:
- 1) dnf update
- 2) dnf upgrade –refresh (NOTE: a dash dash before refresh)
- 3) dnf install dnf-plugin-system-upgrade
- 4a USB) dnf system-upgrade download –releasever=38 (NOTE: a dash dash before releasever)
- 4b ‘Sam‘) dnf system-upgrade download –releasever=38 –allowerasing (NOTE: a dash dash before releasever & allowerasing)
- 5) dnf system-upgrade reboot
Step 4b ‘Sam‘ required my adding the “–allowerasing” to the command-line for the upgrade to proceed, which meant having to download it all again, so make sure you’re doing the upgrade during the best time for your internet connection. 🙂 Also, I can never get WordPress to show the dash dash right (AKA hyphen hyphen) in my posts!? The pics will show them, but you can’t copy & paste from a pic.
Here are pics of the steps (wid red highlights) that I used:
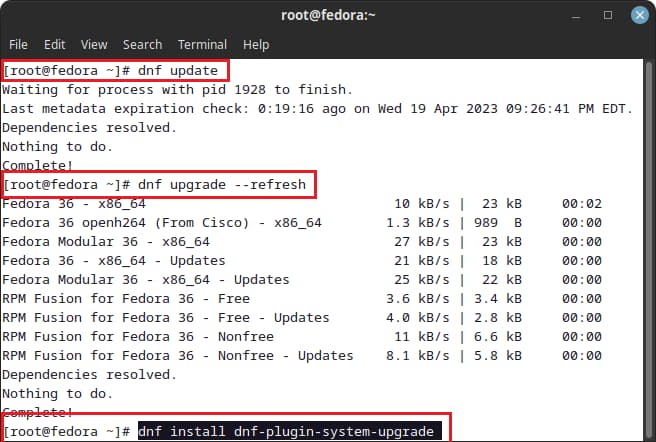
Then:
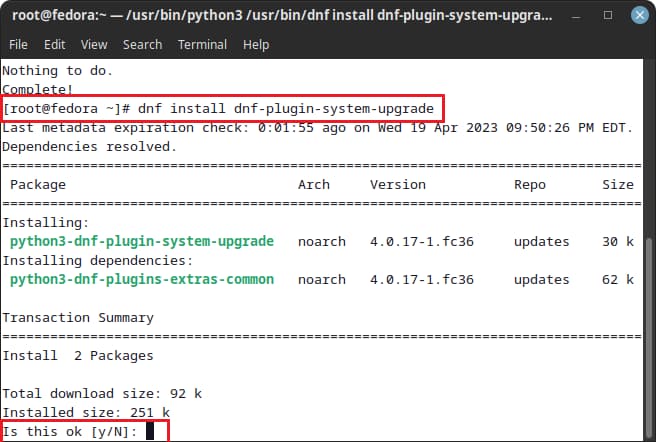
Then—for USB:
Then—for ‘Sam‘:
Then:

That should do it if everything downloaded OK, if not the upgrade will show what is wrong, e.g., when upgrading ‘Sam‘ it said something was wrong (after the downloading completed!?!), and suggested I try adding –allowerasing to the dnf system-upgrade download —releasever=38 command-line.
If all looked OK — Then:
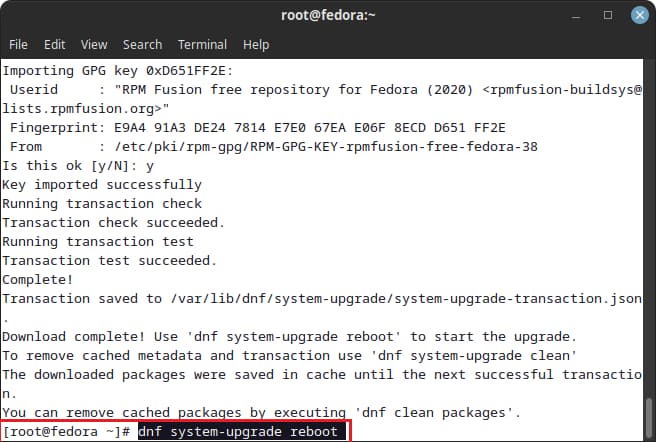
Enter dnf system-upgrade reboot ‘n it will finish the System Upgrade process, which takes some time.
That’s it!
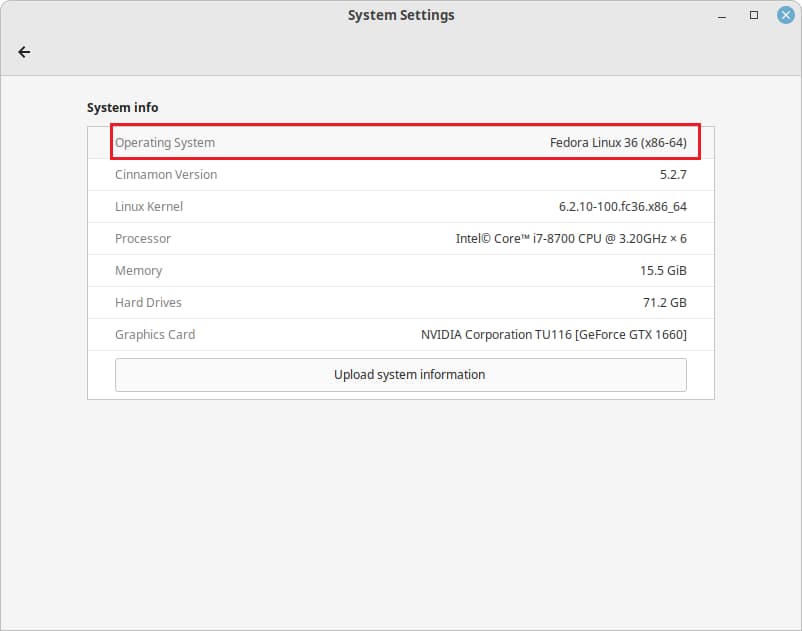
USB ‘Before & After‘

‘Sam‘ ‘Before & After‘
Conclusion
I used to just do clean installs of Fedora because I had used the older versions for 2+ years, or so, and didn’t use it that often since Windows OSes have been my primary operating system. However, the System Upgrade method is so easy, and it keeps all your settings ‘n apps, that I will do the upgrade method in the future — except for testing a clean install of a new release, for posts here.
Porteus 5.0 Cinnamon & Fedora Cinnamon SPIN are my main Linux Distros now—tho I also have Sparky Linux Cinnamon & Puppy Linux on USBs. Still, Fedora is the ‘Leader of the Pack‘ in the Linux World, IMHO.
Part 2 is up next…
