

Fedora Linux 38 is out ‘n I’m doing a two part series on how to do a System Upgrade & a Clean install of Fedora Linux 38 Cinnamon SPIN. Part 1 covered upgrading from previous releases 36 & 37. This is Part 2 ‘n I will be doing a clean installation using the Anaconda installer, and then showing a few ‘Tweaks‘ in post-installation.
‘Anaconda is a fairly sophisticated installer‘ — which, IMHO, stops more users from giving Fedora Linux a try. However, even tho the installer is considered a “fairly sophisticated” one, is not that difficult to use—not once you figure out how to “Reclaim Disk Space” on the Target disk.
I’ll be installing Fedora 38 to a 64GB SanDisk Ultra USB 3.0 Flash Drive, but will be using Anaconda installer pics from a previous post on a Fedora 37 installation, so don’t let the difference in disk sizes distract you — as they say, ‘Size doesn’t matter‘. 😉
Anaconda Installer
Anaconda installer’s Wikipedia description — Anaconda (installer):
Anaconda is a free and open-source system installer for Linux distributions.
Anaconda is used by Red Hat Enterprise Linux, Oracle Linux, Scientific Linux, AlmaLinux, CentOS, MIRACLE LINUX, Qubes OS, Fedora, Sabayon Linux and BLAG Linux and GNU, also in some less known and discontinued distros like Progeny Componentized Linux, Asianux, Foresight Linux, Rpath Linux and VidaLinux.
Download the 2.14GB Fedora-Cinnamon-Live-x86_64-38-1.6.iso from Here. Here is a list of other Fedora SPINS. I find that the Cinnamon DE is most like Windows OSes, which suits me, but other Linux users often prefer other DE’s.
The Fedora Media Writer is recommended to use for creating the Live-USB boot media.
- NOTE: Remember—the following pics are from a previous installation.
Insert the Live-USB boot media & a Target device, and boot’er up! 😉
Welcome to Fedora 38:
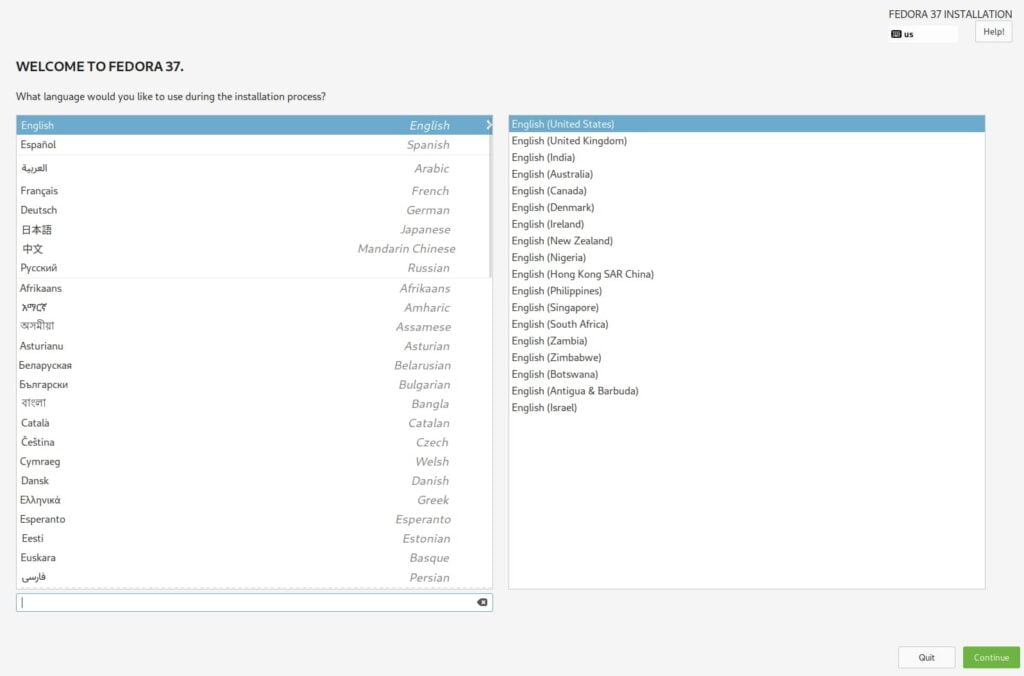
Told you these Anaconda pics were from a previous installation! 😉
Installation Summary:
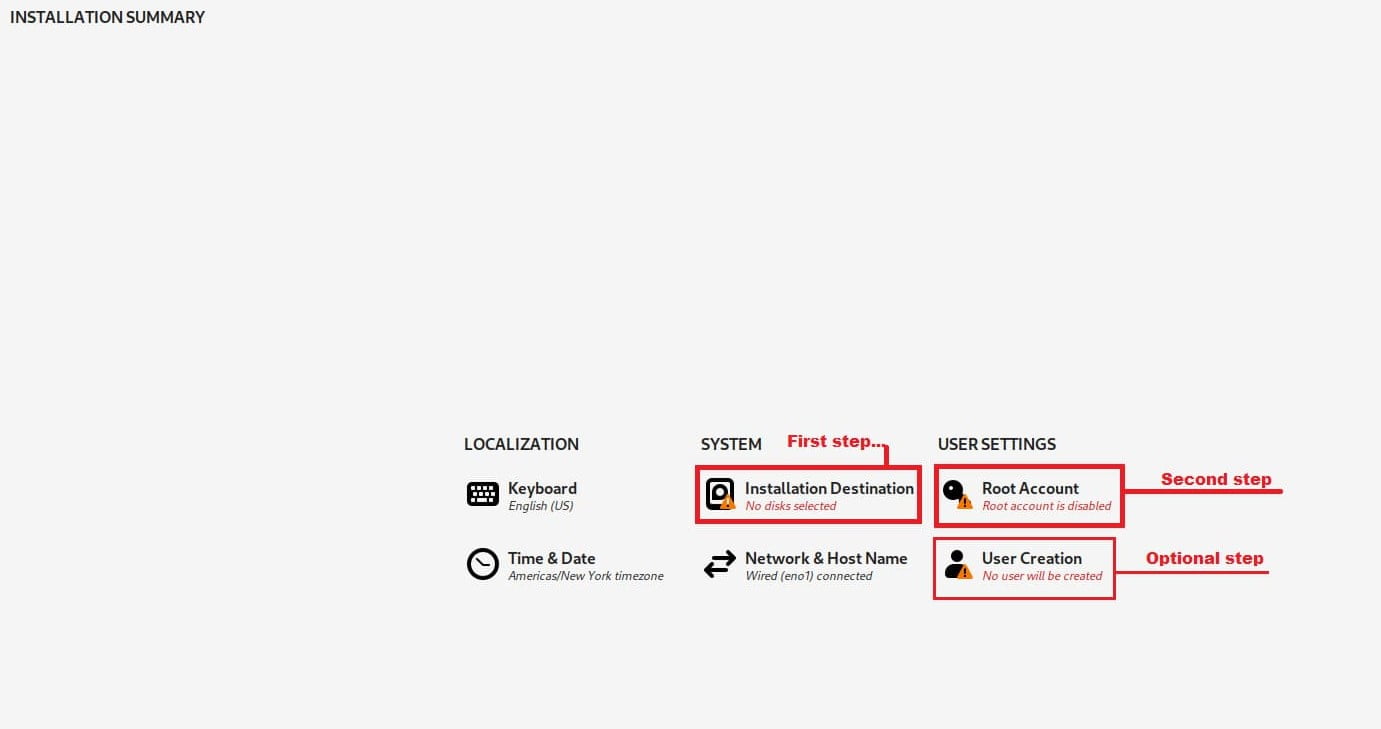
Have highlighted in red the steps I use — First is Installation Destination, Second is to enable the Root Account, and normal users will possibly want to create a User Account wid the Optional step. I don’t have pics of the Optional step since I am a Fulltime Linux Root User on all my computers ‘n OSes that are on USB’s. Once the First & Second steps are completed then the Anaconda installer’s Warning Messages (orange triangle w/ exclamation mark) will go away.
Installation Destination:
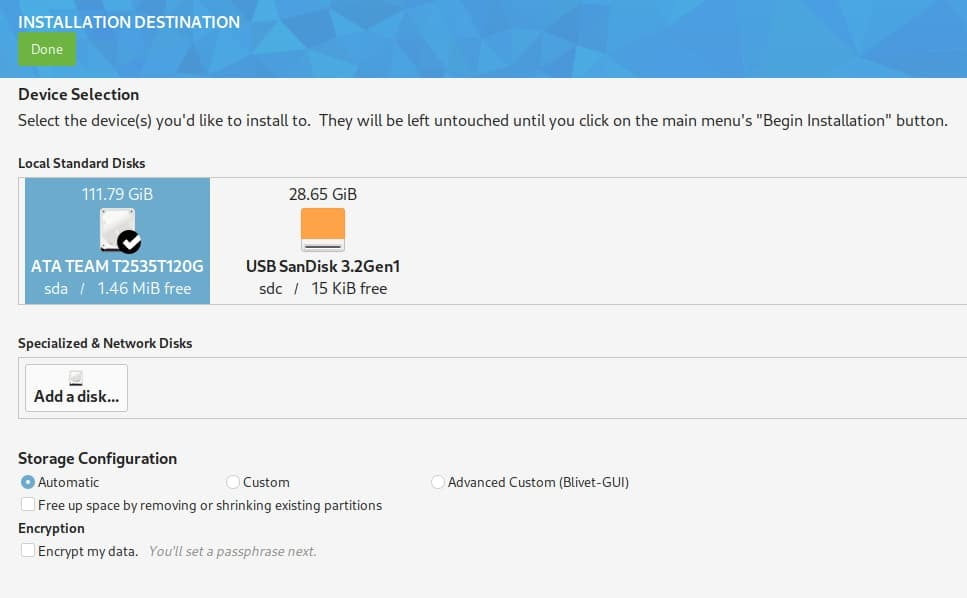
Here’s where you select the Target device for the installation. Make sure there is a ✅ ‘Check Mark‘ ✅ on the Target device you will use — then click Done in upper left corner.
Installation Options:
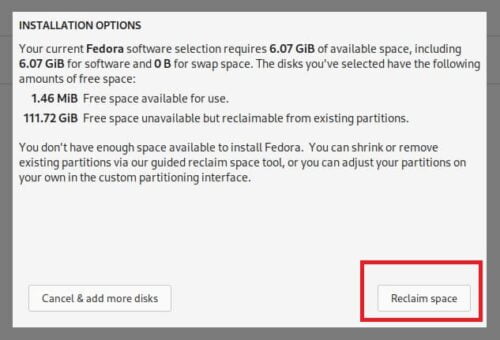
After clicking Done you get a popup ‘n then you click Reclaim space in lower right corner.
#1 Reclaim Disk Space:
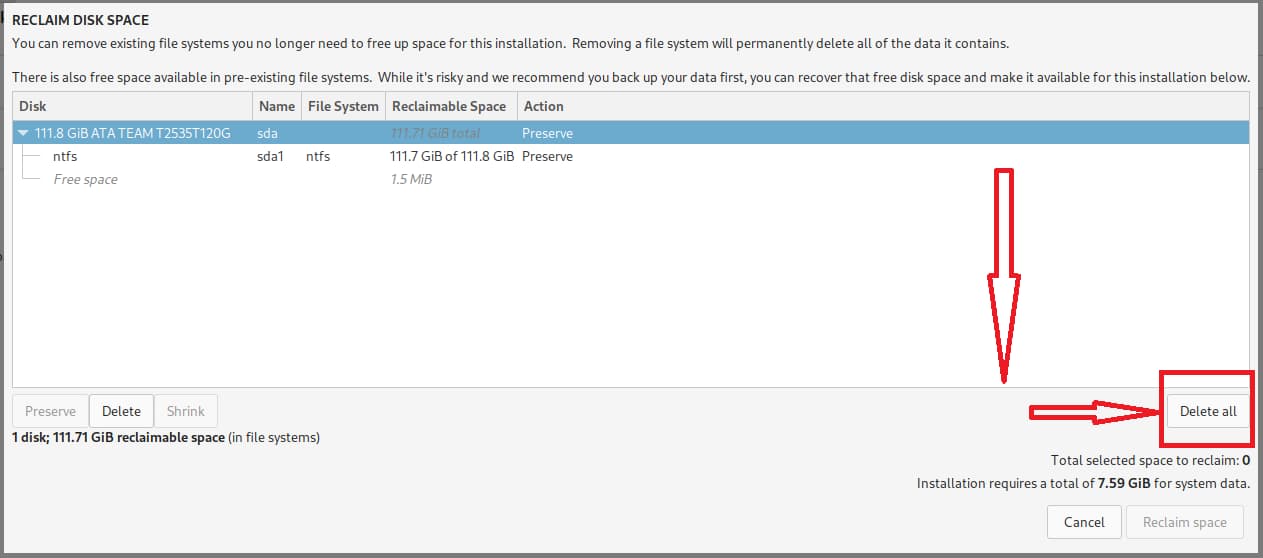
Make sure your Target device is selected ‘n then click Delete all in lower right corner.
#2 Reclaim Disk Space:
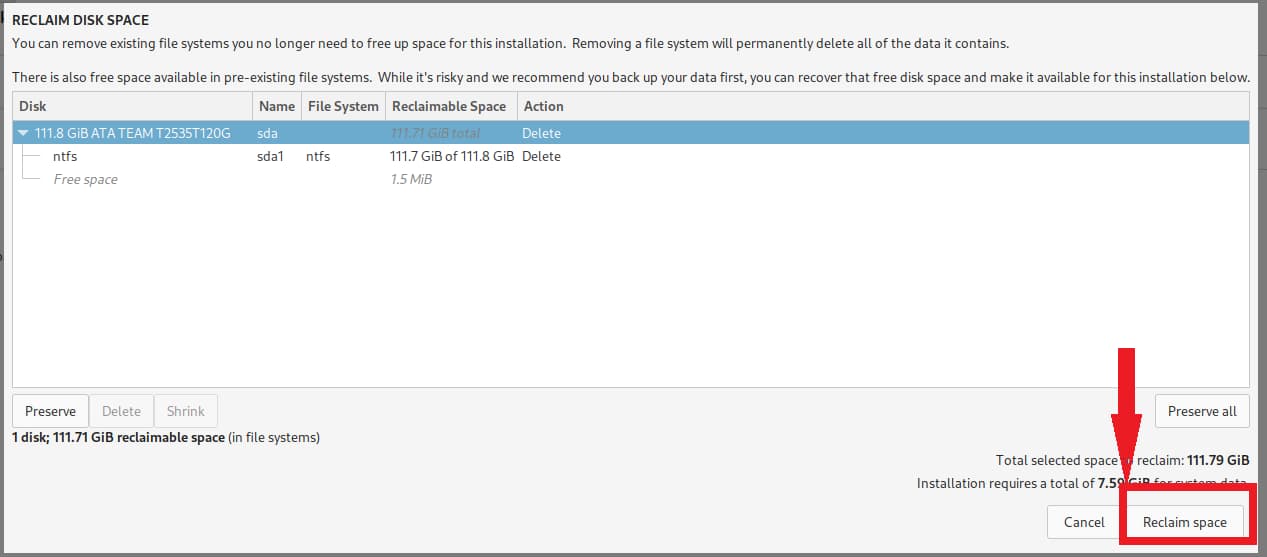
Target device should already be highlighted so now click on Reclaim space in lower right corner.
That takes you back to the Installation Summary window, and now I’ll do the Second step there, the Root account:
The Installation Destination option will actually show the Warning Message cleared from it, but I’m just reusing the same Installation Summary pic. 🦥 Yeah, I’m sloth lazy!
Root Account:
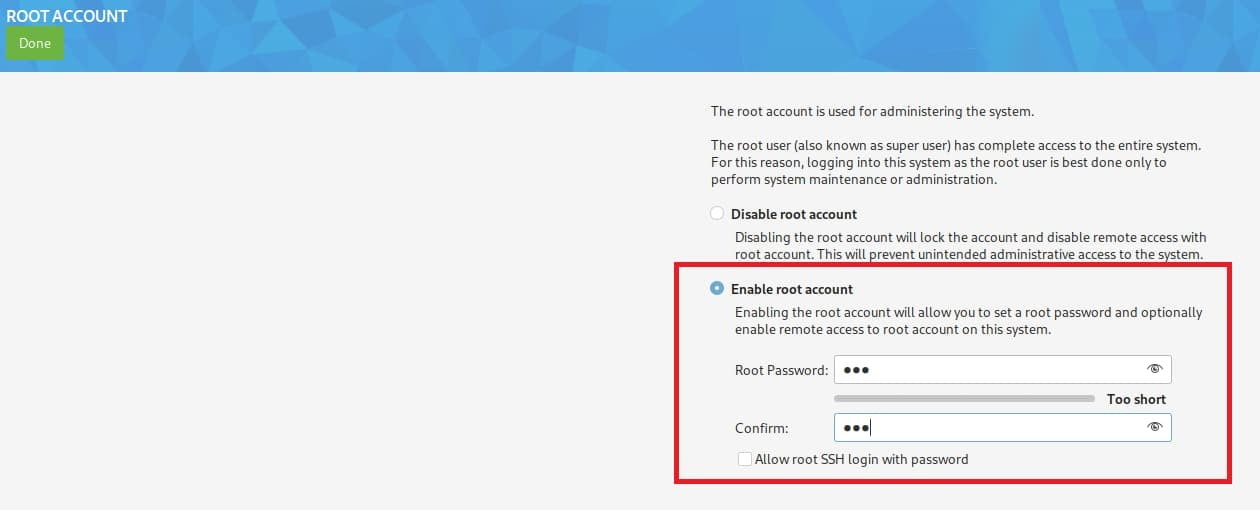
I enable the Root Account ‘n give it a password. The standard User account works about the same way, I believe, but don’t recall ever setting one up under Fedora Cinnamon — tho the Fedora Workstation (GNOME) only allows the standard User account, if I recall correctly.
That takes us back to the Installation Summary window again, where all the previous Anaconda installer’s Warning Messages (orange triangle w/ exclamation mark) are now cleared:

Just click Begin Installation in lower right corner ‘n the Anaconda installer takes over at this point.
Post Installation
At the Login screen/window during boot up:
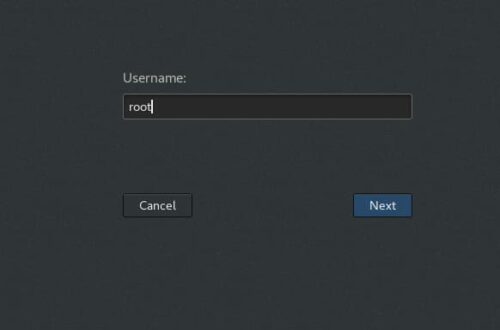
I type in root, but you can type in the User name if you created one and/or root if you also enabled the Root Account.
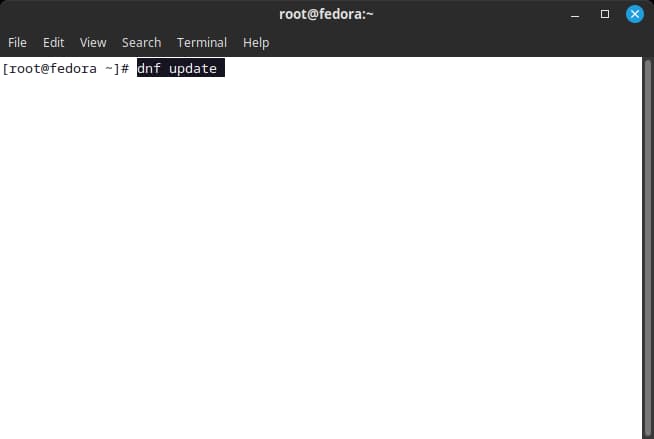
When I get to the new Fedora 38 desktop then an update is the my first step:
BTW, the pics in this section are from the new Fedora Linux 38 Cinnamon SPIN installation.
At this stage, you can start ‘Tweaking‘ your system to how you like it. I usually import Bookmarks and add Extensions to the Firefox browser. Add apps to the Panel ‘n change some setting, e.g., change from Military Time to the 12-hour clock.
Add GParted:

The su -c “yum install gparted” command handles that.
Fedora also has the graphical dnfdragora package manager for adding apps ‘n Wallpaper ‘n etc.

Install Nvidia Driver
I have Nvidia GPU’s on my desktop computers, so will show how to install a Nvidia driver on Fedora 38. I had mentioned having an issue wid a Nvidia driver during an upgrade in Part 1, but resolved it; however, wasn’t happy wid the resolving, ‘n so tested again wid just a clean install.
The Anaconda installer had spotted my Nvidia TU116 GeForce 1660 ‘n installed the nouveau NV168 driver for it – on my ‘Rose‘ test computer – however, I wanted the Nvidia proprietary driver. Maybe one of these days Fedora will allow the GPU proprietary drivers to be installed during the installation process – like quite a few other Distros do, or offer an easier way post installation. 😕
Turns out that a method I had been using since Fedora 32 wasn’t working right wid Fedora 38. One or more of the steps in How to install the NVIDIA drivers on Fedora 32 wasn’t working, so I looked for another method, and found it here – Installing Free and Nonfree Repositories & How to NVIDIA.
The RPM Fusion Free & Nonfree Repositories need added before the Nvidia driver gets added. On the Installing Free and Nonfree Repositories page, look for the Graphical Setup via Firefox web browser section:
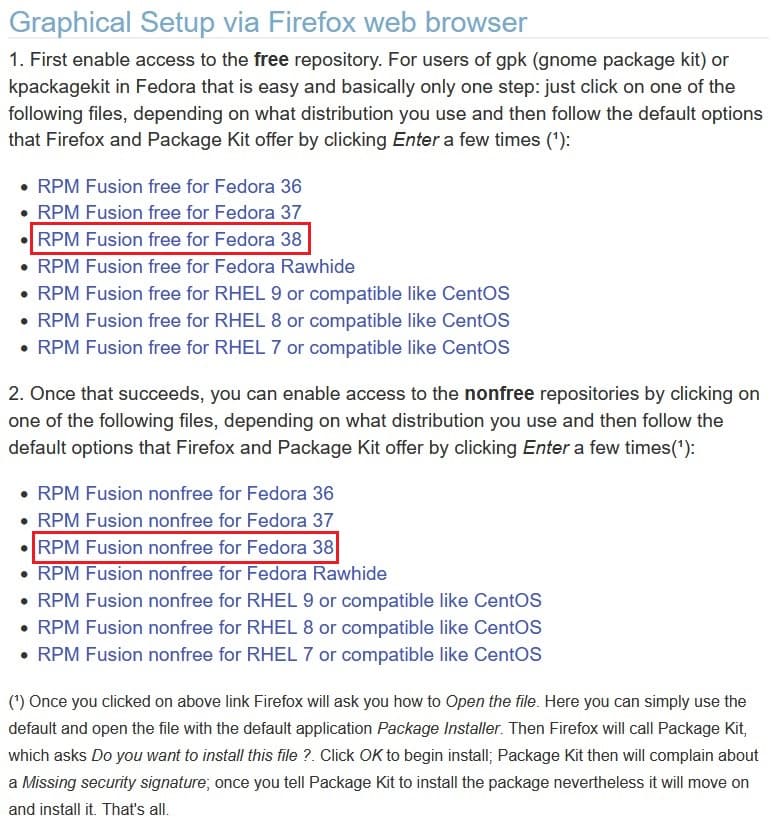
I do the RPM Fusion free for Fedora 38 first ‘n then the RPM Fusion nonfree for Fedora 38. They will be downloaded to the Downloads folder:

Click on the rpmfusion-free-release-38.noarch.rpm first ‘n that opens dnfdragora package manager that will install it. Then do the same wid rpmfusion-nonfree-release-38.noarch.rpm.
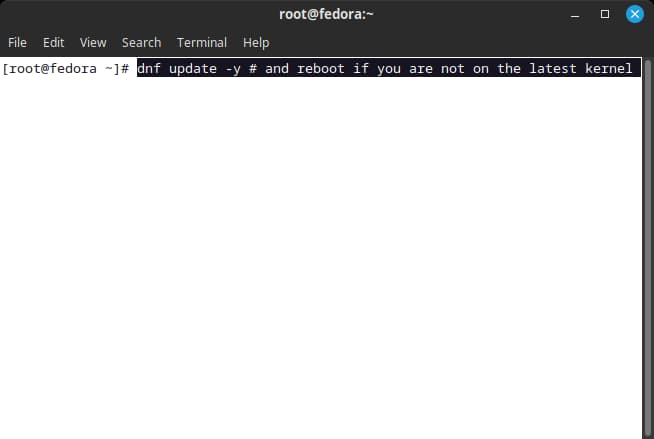
Next we go to the How to NVIDIA page ‘n scroll down to the Installing the drivers section. My GPU is listed as a Current GeForce/Quadro/Tesla — yours may be different, but this section covers “This driver is suitable for any GPU found in 2014 and later.” Open the terminal and type these three command-lines:
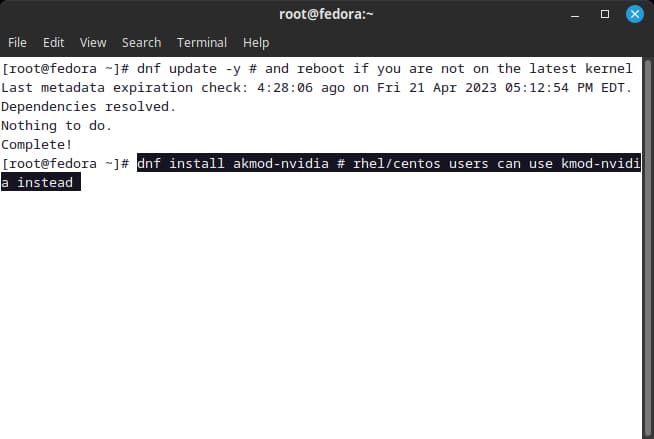
1) sudo dnf update -y # and reboot if you are not on the latest kernel
2) sudo dnf install akmod-nvidia # rhel/centos users can use kmod-nvidia instead
3) sudo dnf install xorg-x11-drv-nvidia-cuda #optional for cuda/nvdec/nvenc support

The second one takes the most time to download. NOTE: Since I am a Fulltime Linux Root User on all my computers I don’t use “sudo” in my command-lines.
Complete! – so we need to reboot now:
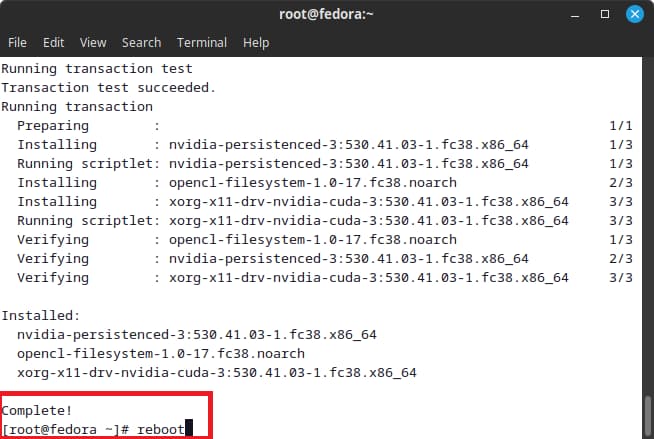
Success — \o/ ‘Hippity hip Hoorah‘ \o/ 👍😁👏👌
The inxi -F command-line for hardware:
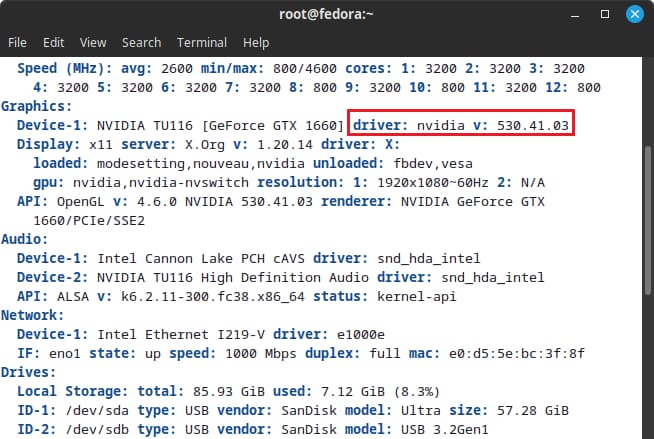
‘Thars my Nvidia proprietary driver!
Here it is again – Officially:

Conclusion

Fedora Linux 38 Cinnamon SPIN installed, wid a Nvidia GPU, panel pretty set now, and most all ‘Tweaks‘ finished!
Another great job by Fedora Linux!