
![]()
(NOTE: Am closing down my old Linux Newbie – since 1996 WordPress.com blog (is Private now), and am in the process of refreshing and moving some of the content over to my self-hosted KM&T (Karmi’s Musings & Tech) blog here.)
This is Part 3 of this Porteus v5.0 series, and I am sorta gearing the series towards MS Windows users, but still mindful of interested Linux users. I have been using Porteus Linux since March of 2022, but have found it to be the most interesting Linux OS I have ever used (since 1996), and it has already become my favorite ‘Working‘ Linux OS. I had been using the Porteus 5.0rc3 until Porteus 5.0 was released on July 3rd, 2022. The 5.0 release candidate 3 was fine, but the Porteus 5.0 final release has been smoother ‘n snappier than 5.0rc3 was. Porteus’ Developers/Team have done an excellent job!
In Part 1 we covered creating a fat32 ‘Live‘ Porteus USB, and then using its GParted app to prep a Target drive.
In Part 2 we prepped a Target drive wid two partitions – a 360 MiB fat32 partition & an 114.26 GiB ext4 partition. Then we used the EFI, boot, and porteus folders – located on that fat32 ‘Live‘ Porteus USB to create the new Porteus 5.0 Cinnamon installation that had a fat32 ‘n an ext4 partition.
- This was the best method I could come up w/ for any interested MS Windows users, who might not have access to apps for creating ext4 formatted partitions.
Quick Porteus info
Here is the Official Porteus Installation Guide. Their Forum is probably the best source for quick and helpful information. Here is the actual Porteus Home page.
Username for root is root and password is toor. User name for guest is guest and password is guest.
First Boot Up
My guide is for creating a Fulltime Linux Root User Porteus OS. I can’t stand annoying “Authenticate” popups or other ‘Pesky Passwords’ requirements. What are “Authenticate” popups? They show up looking for your password when you try to do something w/o ‘Their‘ permission:
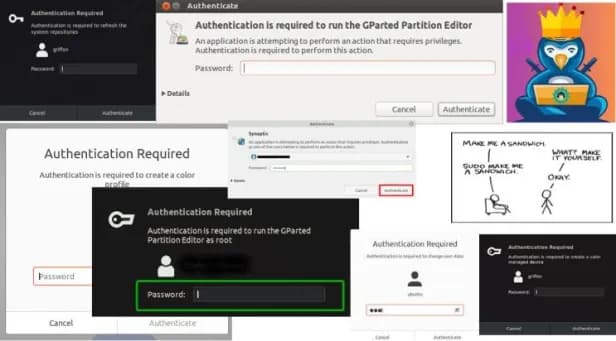
You’re probably using the mouse when one pops up, which means you have to stop using the mouse, then move to the keyboard, then type in your password, and then move back to the mouse. Slows down the OS users workflow. ‘Think‘ Passwordless instead…
However, the guest section can always be used if you prefer, and a standard user can also be created if you want one.

That’s close to what the Graphical menu window looks like, but I haven’t been able to get a pic of the real one, i.e. I borrowed that one. 😉 If you’re not sure what to do, just let it boot into guest session for you.
There are 3 Options I have used in that Graphical menu.
Option 1 – Graphics mode:
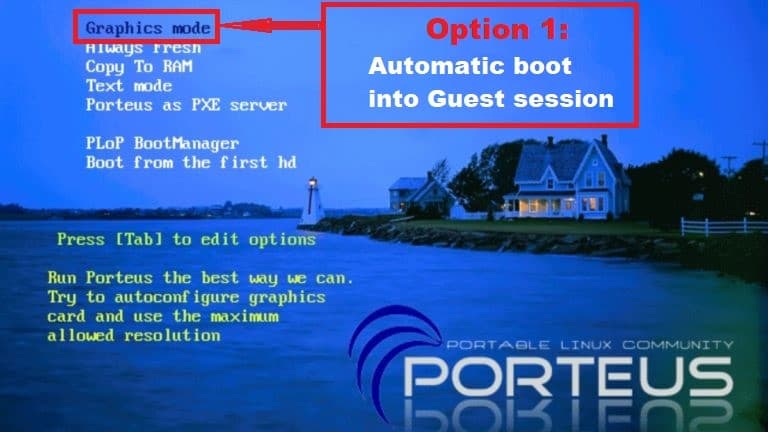
Graphics mode is the default option in the Graphical menu. If you do nothing to the settings, it will boot into the guest user section automatically.
Option 2 – Text mode:

That option boots into a TTY console (like a terminal or command prompt), where you can login as either root or guest. Sometimes, you may make a mistake or a computer glitch happens and you end up at the TTY console…no worries. Just remember – Username for root is root and password is toor. User name for guest is guest and password is guest. Then the prompt will look for you to type in – startx – before system will boot into the desktop.
Option 3 – Press [Tab] to edit options:
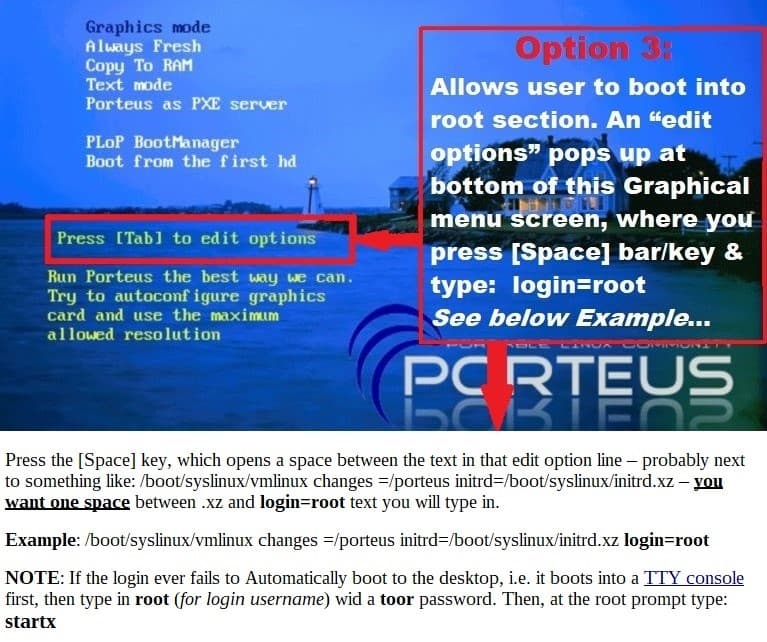
- Don’t ever let an Operating System ‘Bully‘ or intimidate you! 😉 This option may be a tad ‘Tricky‘ at first, so don’t worry if you end up at the TTY console.
One more time:
At that Graphical window, ‘Press Tab to edit options‘ so you can login as root during bootup.
After hitting the [Tab] key an “edit options” pops up at bottom of Graphical menu screen. I don’t have a pic of it, but it’s like a wide ‘n thin terminal where you can type into. Press the [Space] key, which opens a space between the text in that edit option line – probably next to something like: /boot/syslinux/vmlinux changes =/porteus initrd=/boot/syslinux/initrd.xz – you want one space between .xz and login=root text you will type in.
Example: /boot/syslinux/vmlinux changes =/porteus initrd=/boot/syslinux/initrd.xz login=root
As a Fulltime Linux Root User on all my ‘Computers‘, I go to the porteus.cfg file after First boot into the new desktop, and add the login=root there, so from now on it will automatically boot into the desktop.
Editing the porteus.cfg file
The Graphical menu options are fine to have around, but I just want to automatically boot into the desktop as root after that First Boot Up. To achieve that objective, we’re going to open 3 new windows: 1) that 377 MB fat32 partition (sda1 for me). 2) then the boot folder. 3) then the syslinux folder. Like this:

- After you learn how to find the porteus.cfg file, you can do it w/o having to open folders in new windows.
We are now in the syslinux folder, where we can just click on the porteus.cfg file to open it – like this:

Then scroll down the porteus.cfg file until you get to the “LABEL GRAPHICAL” section:
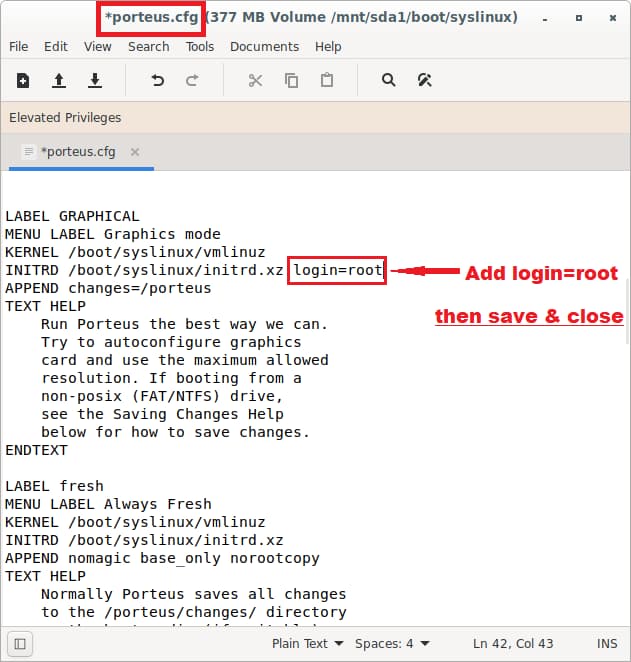
Look for the “INITRD” line, hit [Space] key at the end of that line, and then add login=root to it. Double-check that you have it right, then save it, then click close and exit the window. Reboot, and the system should now automatically boot into the desktop from now on. \o/ ‘Hippity hip Hoorah‘ \o/
(NOTE: Porteus actually recommends that login=root cheat-code be added to the “APPEND” line – just below the “INITRD” line, but I have done it both ways.)
…to be continued.